 Doc is making drawers for the back of my ute.
I’m not sure if this is because I keep suggesting that taking the Cruiser away would be much more practical, or in spite of it!
When we went to the Cape he fitted the Cruiser with a set of drawers in the back. These were bought second hand on ebay, but it did inspire him to do some more work on setting the Cruiser up for long trips. He pulled the back seat out and put in a platform for the water tank and fridge. Next to that is a basket for maps and other bits & pieces we use while we’re driving, the inverter, a cupboard for the eco pot, and space for the tool box and my camera gear. The table and chairs and some recovery gear gets stored under the platform. He also turned the tailgate into a food preparation area.
I loved it, it made everything so easy. We’d pull up somewhere, pull out the table & chairs, put up the roof top tent and within 5 minutes we’d be sitting down with a glass of wine and plate of nibblies watching everybody else struggle to set up camp.
 When I did my first “Two Sheilas in a Ute” trip to Broken Hill all the gear was stored in the back of the ute in big plastic containers.
It was a pain in the arse.
Things on the top would have to be pulled out to get to the things on the bottom, lids had to be stored somewhere, and everything ended up sitting on the tailgate leaving me with nowhere to prepare food. And because the fridge sat on the back seat it wouldn’t quite open properly as the lid hit the roof, making it more difficult to get things in and out.
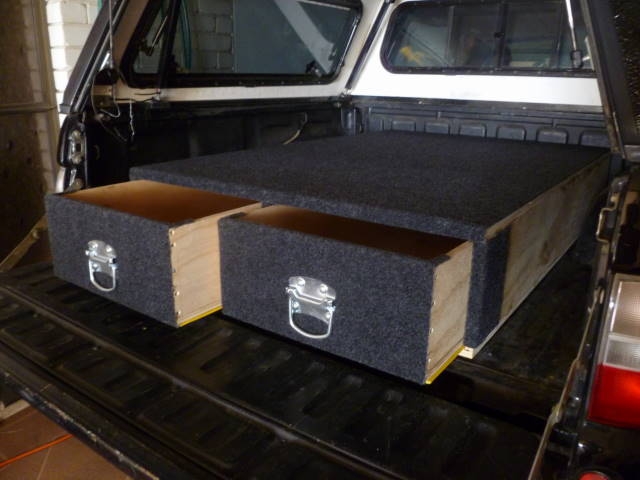
Not that I didn’t enjoy the trip, but it did make things a bit more difficult than they needed to be. So this time I’m getting the ute fitted out much like the Cruiser.
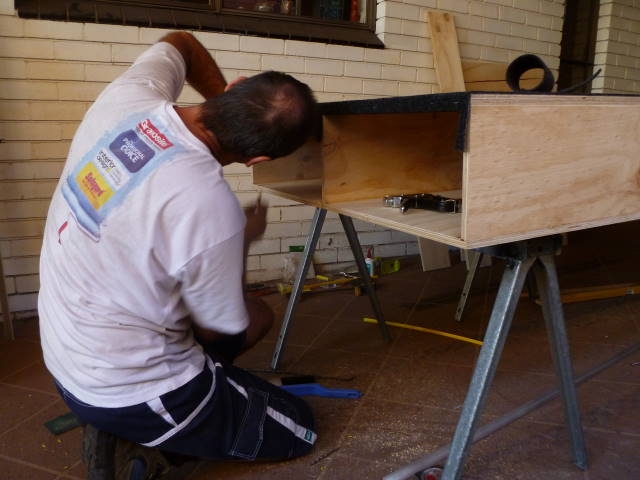
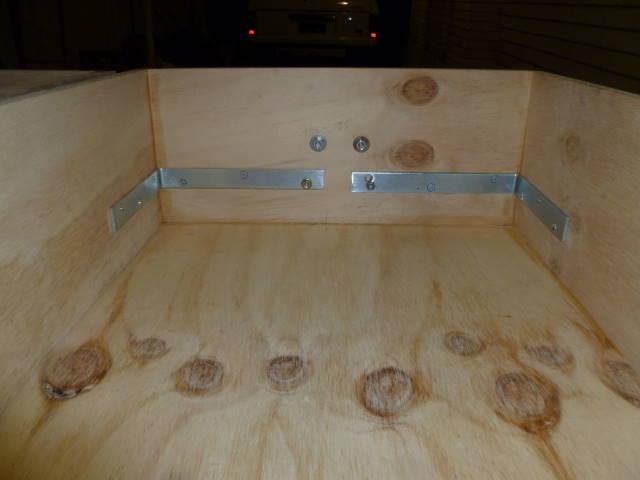 And this time Doc has made the drawers from scratch. As he’s much more comfortable working with metal than he is with wood this is a big thing for him. Very big.
We spent hours discussing what I would need the drawers for – what would go into them, how long they should be, how wide, measuring the equipment I wanted to put in and working out the best size drawers for it. The final decision came down to …. how wide is the ute, and how long! The drawers fit the length of the ute, and there are two drawers each half the width of between the wheel arches.
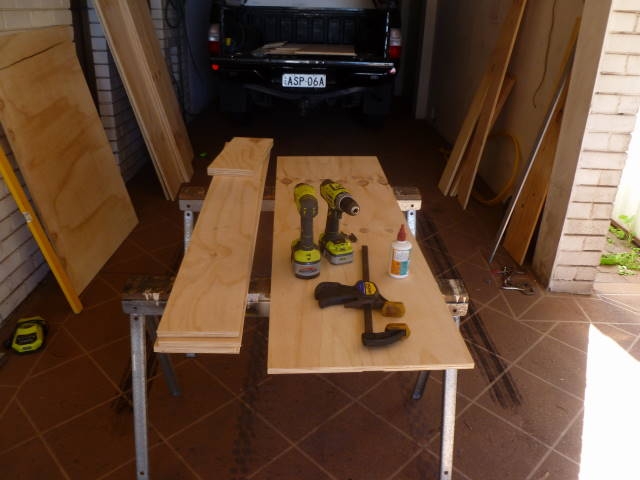
Then we had to decide what thickness wood would be best. Too thick and it’s too heavy and you lose too much space in the drawers themselves. Too thin and it’s not strong enough. I didn’t know you could have so much conversation about the relevant merits of 15mm v 19mm plank! So off Doc went to Bunnings to get the 15mm wood, and came home with 15mm for the drawers and base and 19mm for the top. This one was decided by very poor service at Bunnings – nobody was around to serve him so he walked out and went to Joes’ DIY, an independent timber yard close to his home. The people there not only told him which thickness would be best, but also cut it to size for him. After they reworked and corrected his measurements. All at the same price as the wood at Bunnings.
S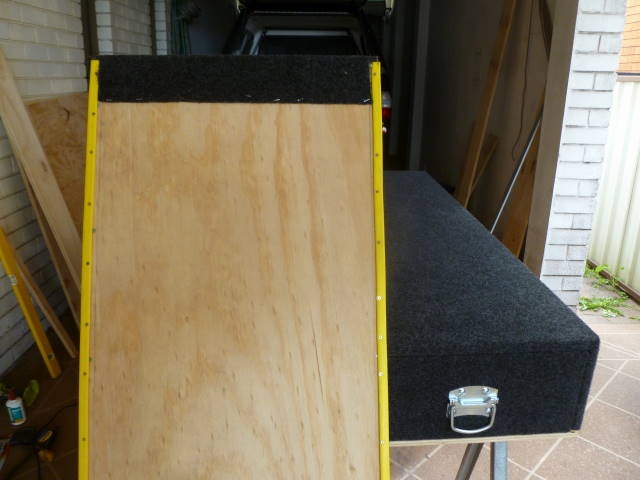 o everybody, here’s a lesson. Support your local, independently owned and operated businesses! [This recommendation is solely because of the service we received, neither of us have been paid in any way for this.]
The next decision was what colour carpet should go on top. The ute is black so did I want it to match, or a contrasting colour? Maybe a grey? I wanted black, which was fortunate as it was the only one available when we went to buy it.
So after a weekend of working on it, the drawers are finished (almost, just a few finishing touches to go). Fixing up the back of the car for the fridge, etc will be done closer to the time so that we still have a backseat in the car while we’re here.
I already feel like I’m closer to leaving. Less than 5 weeks to go! So get your suggestions for our itinerary and route in.