Well, I’ve finally got Doc to set out how he prepared the vehicle and what tools he took for our Great Cape York adventure.
The short answer is – lots. So this might have to be spread across a couple of blogs. I’ve already said something about the vehicles, so let’s start with the blokey mechanical-type stuff.
It might seem obvious, but there’s a lot of preparation that goes into a vehicle prior to a trip such as this. The remoteness of the area together with the tough driving conditions means that you do need to carry a lot with you.
Remember, you’re trying to get there AND back again.
Having made a few trips in remote areas before, Doc already had a lot of gear, but we decided it was time to restock and rework the layout of the car. This took a lot of shopping around at camping and 4WD outlets, checking out camping shows (we even travelled to Canberra for one), and chasing up specials.
And Ebay. Doc loves ebay. I think he sat at the computer for hours every night trawling for various items.
Never again will I believe men don’t like shopping!
Remember – this is our experience of the products we used. It’s not a professional comparison of different brands so you might have a different experience to us. We haven’t been paid to promote any of these products, nor did we get any of them for free [although we’re open to future offers!!]
Vehicle service
As with everything, he started with the basics in a good general service and checking of everything on the car – replaced any components showing signs of wear, replaced the rear brakes and rear wheel bearings, and seals and extended the diff breathers.
Everything – and I do mean everything was gone over with a fine tooth comb and checked for tightness, security and general wear. Those corrugations shake your vehicle around more than they do you, and you don’t want anything falling off on the way.
He also did this every day while we were away – a general check over the vehicle to make sure everything was still where it should be. This is good insurance particularly after a day on corrugations or over some rough stuff. Even if you don’t know what you’re looking at, sticking your head under the car daily will help you become familiar with how everything should look so that you’re more likely to notice something out of place
Wait until the vehicle has cooled down though as you can cop a burn off the shock absorbers for ages after they have bounced around on a rough track.
Tyres
Doc says the tyre debate is just as fierce as the Holden vs Ford debate, and judging by the discussions (or arguments) between perfect strangers on the trip, he’s right. While the experts will tell you the trick is applying the right tyre for the job at hand, the reality is that it’s just not practical for most people to get different sets of tyres for every trip they do.
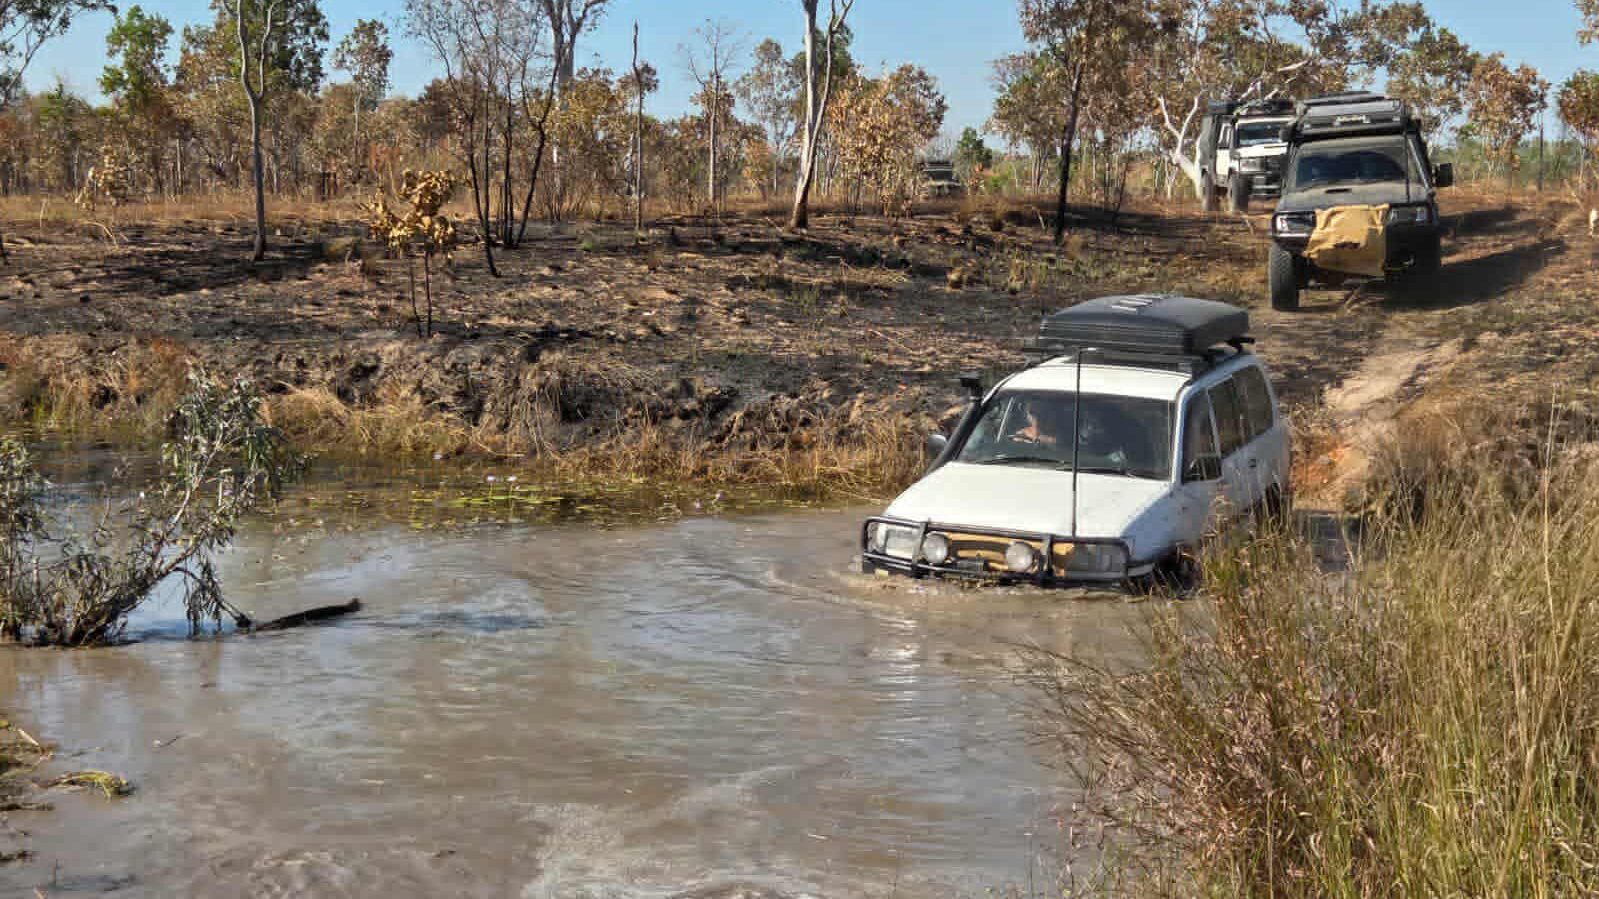
For this trip Doc bought Micky Thomson Dick Cepecks, and according to him they were an outstanding choice. They’re an overall tough tyre, with an aggressive tread pattern which meant they had good traction in all the conditions we faced. They gave us the traction needed to rescue a couple bogged up to the grill in thick mud, and handled the soft sand through Nolan’s Creek crossing with ease. If you’ve done the Old Telegraph Track you’ll know Nolan’s. It’s scary, for good reason. It’s deep and soft, and cars get drowned regularly. When we went across there was a couple who had been camping there for three days watching the show. It’s the best entertainment around.
Before this, we had Toyo all terrains on the car, which were great for the type of driving we had been doing – that is mostly highway, some dirt road, and some light 4wd work over dry rocky ground – but they just didn’t cut it in mud or on wet grass. They didn’t handle the farm well in wet conditions, so we felt they just weren’t going to cut it for the rough driving on the Cape.
Winch
(I have no idea what he’s talking about here, so this is verbatim – over to you DocJ
My current non-winch bar is strong and well built and I couldn’t find anything else of the same quality for a reasonable price. Rather than pay top dollar, I fitted a Warn winch to the non winch bar. This was plenty of work and not a task for the inexperienced or faint hearted. It was extremely fiddly, and even with protective gear resulted in me getting lots of little burns, but the result was worth it. [note: I can vouch for this. We went through lots of burn ointment and I gave lots of suitable sympathy throughout, even though I thought he’d developed tourettes at one stage!)
Winch bars on older 4wd’s are longer than non winch bars so if you can fit a winch to a non winch bar you retain a better approach angle than the winch bar.
In the process I ditched the large IPF driving lights as these, combined with the mods to the bar, had reduced the area for air entry to the radiator. I sourced a smaller set of Narva compact driving lights, which did a really great job and offered a surprising amount of light for their size as well as coping with vibration, corrugation, water and dust.
General recovery gear
We used Super Cheap branded tree trunk protector, anchor strap, winch extension strap & a snatch block. All of these got used, and proved to be good quality and up to the task without any hint of failure or excessive wear. In fact, snatching one car out of the mud, their bull bar broke before our equipment showed any signs of strain. Great value for money!
Two heavy rated D shackles – 4.7 tonne to be exact – and an ARB recovery hitch & shackle fited to the rear tow point of the ‘cruiser. Don’t skimp on these items as they really cop a flogging when it’s time to recover the vehicle from a bog.
Of course, a long handled shovel for digging out of sand or mud. A long handle is essential to get right under the car when you’re buried up to your belly. If you don’t have room in your vehicle for a long handled shovel, bolt it onto the side of your roof racks. If you make the mistake of only taking a short shovel, as I’ve seen people do, you will have to climb under your car to dig it out. And that is not fun!
We had a BushRanger compressor, which worked like a dream for the many tyre adjustments needed for driving like this. Tyres were deflated and reinflated a few times a day sometimes as we went from sand to rock, back to sand and through creeks. You can find similar looking items at a cheaper price, but beware. While Doc might argue over the value of cheap –v- expensive washing powder, when it comes to his tools he’s adamant – cheap arsed imitation stuff just doesn’t do the job – and cheap compressors are prone to cutting out from thermal overload before all the tyres are pumped up. The Bushman has proven its worth in all conditions for the years that he’s had it.
Tools
Do not be tempted to build up a second rate toolbox because you don’t want to lose your good gear out in the scrub. Losing an item or two is far preferable to being stuck in the middle of nowhere with broken tools, or tools that won’t do the job you need them to do.
And try to avoid the temptation to carry everything – just in case. This will just add unnecessary weight which might in turn result in damage that wouldn’t have happened if you were travelling lighter.
Doc says try to picture the repairs you might have to make to prompt what you might need, and be a bit creative and imagine non-traditional uses for your tools and parts. After all, you can’t carry everything with you so you might need to use what you have for things they weren’t designed for.
Doc carries the following”
- 1/2 inch drive metric socket set
- 1/4 inch drive socket set which includes screwdriver & other tips
- screwdriver set
- ring spanners, ring open end spanners and a recent addition of ratchet spanners
- Combination pliers, long nose pliers, side cutters, vice grips, crimping/wire stripper pliers, brake hose pliers, large & small multi grips, metric allen keys, small medium & large shifters,
- nylon hammer, ball pein hammer
- hacksaw
- chisel
- pin punch, centre punch,
- stanley knife, ruler & tape measure
- small multi meter
Spare Parts
Radiator hoses (you can use your old ones if they are in good condition); fan belts; greased front & rear wheel bearings; a full front hub overhaul kit; oil, air & fuel filters; wire; fuses; plenty of nuts, bolts & washers; hose clamps (these are great for lots of fixes and not just hoses, Doc used two joined together to secure the rooftop tent to the roof rack after the retainer bolt was shaken off)
And for those instances – and there will be some – where you don’t have the right tool or part you need plenty of cable ties in a variety of sizes, good electrical tape, sandpaper, sealant, battery terminals, wire joiners, WD40, liquid metal, tank sealer and a spare ratchet strap or two.
It’s a good idea to throw in some shock absorber rubbers, nuts, bolts & washers too and weird or specific to your vehicle set up nut bolts etc.
It’s also a good tip to keep any screws, nuts, washers or bolts you see in your travels. Odds are they’ve fallen off when something went wrong on somebody else’s vehicle so might just be what you’re looking for when the same thing goes wrong with yours.


Pingback: You don’t need to be a 4WD expert to enjoy a good travel experience. « Kathleen